|
|
|
 The knot-pattern for each bracelet can be ordered
as a PDF-file, for the cost of $1.00. (Two examples follow below.)
Anyone who has already made friendship bracelets before will certainly be able to make them from
these knot-patterns.
For beginners, a PDF-file contains the first 14 pages of detailed knotting directions -- including pictures --
for bracelets number 1 through 5. If you order bracelets No. 1 - 5 (upon payment of $5.00) I will send this file
together with the knot-patterns.
For all who have already knotted friendship-bracelets before, some short directions follow here,
which can be downloaded as a PDF-file.
download short directions
There are two Categories of Friendship Bracelets:
Category 1 (bracelets No. 01 - 60 and 101 - 140):
These bracelets are made according to color, the rows are almost always knotted diagonally.
The threads change their positions and usually all four knot types are used.
Category 2 (bracelets No. 61 - 100):
These bracelets are knotted horizontally, row after row, never diagonally! Only two different knots
are used (the Right-Left- and the Left-Right-knot), whereby the threads always retain their original position.
You will need embroidery floss, all strands of equal thickness. The bracelet should be 1'' (2,5 cm) shorter than
the circumference of the wrist, because you need a space for knotting the ends. The length of the bracelet
depends on the thickness of the threads. For example, if your wrist measures 6'' (15 cm), the bracelet should
be about 5'' (12 - 13 cm) long.
If you measure in inches, 4 inches equal about 10 cm. (Exactly 1 inch equals 2,54 cm)
60 cm = 24 inches
70 cm = 28 inches
80 cm = 32 inches
90 cm = 36 inches
100 cm = 40 inches
110 cm = 44 inches
120 cm = 48 inches
130 cm = 52 inches
140 cm = 56 inches
First, you cut the appropriate number of threads, gather them all together, tie a knot at the upper end leaving
a tail of 6'' (15 cm) for the braid you make in the end. Then you put a safety pin through the knot and fasten it
to a cushion, which can be held between your knees. You can also fasten the knot to your jeans a little bit above
your knee.
Then you arrange the threads in the exact order indicated on the knot-pattern like a fan on your lap.
(Another method of starting a bracelet is explained below under "Tips".)
Mostly, the lengths of the threads are different. You can choose an easier way by cutting all threads to the
same length, meaning that all threads have then to be as long as the longest thread. You can also cut the longest thread
or threads first, and afterwards cut the rest as long as the second longest thread. This is especially recommended for the
Category 2 bracelets, because you won't need to pay attention to the lengths when threads have the same
colors. The disadvantage is a bit more waste at the end.
Also, you will need a blunt embroidery needle to open knot mistakes. Pull a colored thread through the eye
of the needle to keep from losing it. I keep this needle pinned to my cushion, because even after more than 10 years of
knotting, I still have to make occasional corrections on each bracelet.
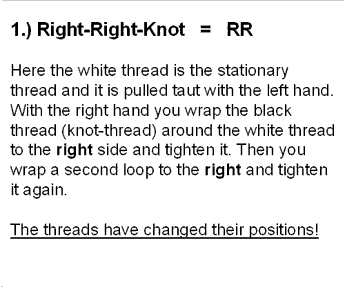
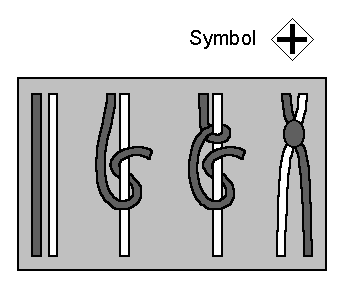
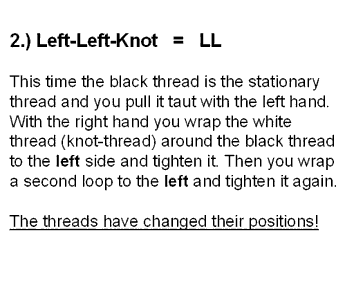
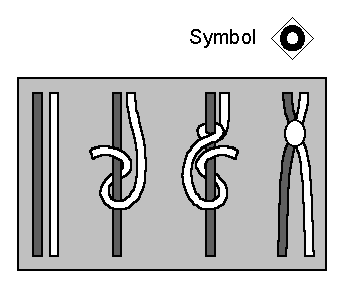
Each square represents a double-knot. There are right knots and left knots, and the following four possibilities
result from this:
|
|
Tips
The first knot should be pulled very tight; the second knot, which forms the "visible dot", should be more
loosely knotted. After tightening the second knot, pull the knot-thread slightly downward, so it's positioned
in the same downward direction as the stationary thread.
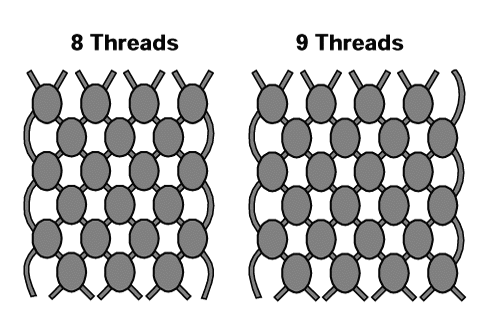
This is the structure of the bracelets with an even and an uneven number of threads:
|
|
|
An easier method starting a bracelet is to tape the threads on a table with either a duct tape
or a packaging tape. This is how you do it:
First you cut a piece of tape and stick it the other way round (the sticky side upwards)
on a table by folding over a little bit at both ends, which you fasten on the table. Then you take the cut
threads and stick them in the correct order very close to each other on the tape leaving 7'' (18 cm) measured
from the bottom end of the tape. Because you don't make an overhand knot you have to leave a bit more than with a knot.
But attention, you have to stick the threads in reversed order on the tape!
Then you turn the tape around and fix it on the table or at the edge of the table, this way the threads are hanging downwards.
After having knotted a bit (about 1 cm) I remove the tape, make an overhand knot and go on knotting by fixing it to
my knotting cushion.
Lengths of Threads
The lengths of the threads are indicated on the knot-patterns. If you use thinner threads
(DMC is a bit thinner than the threads I use) you should cut the threads a bit longer.
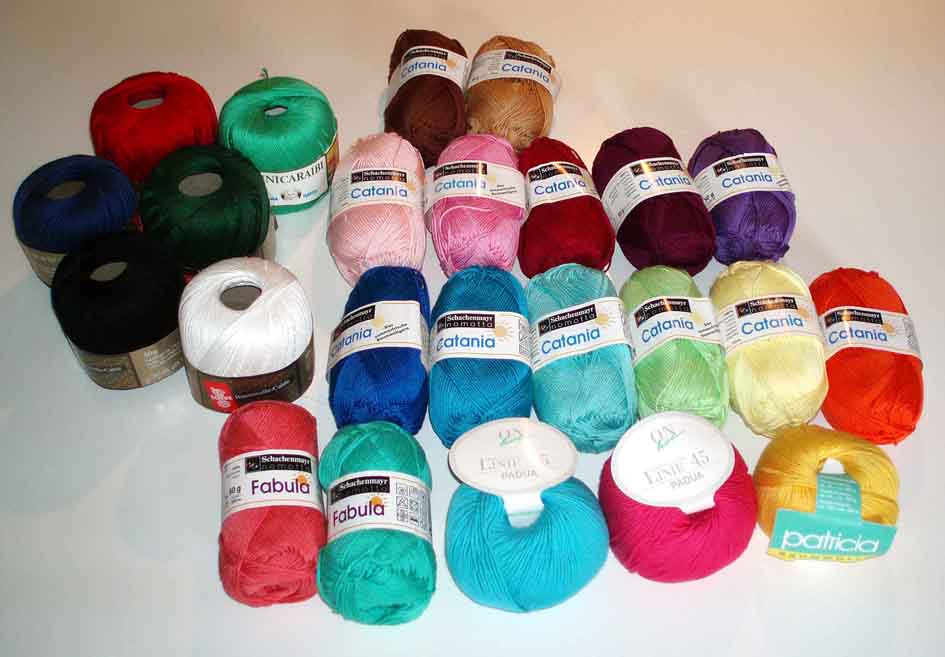
I use cotton wool of different manufacturers:
|
|
|
These threads are mostly a bit too thick. I make them thinner by pulling out one or two single threads
out of the whole strand. You can download directions for how to do this as a PDF-file here:
download How to make threads thinner
If a thread runs short or rips off, you can add a new thread. You cut a new thread and tape it with a piece
of tape onto the backside of the bracelet. If the short thread is a stationary thread, you make one double-knot
around the short and the new thread. Then you just go on knotting with the new thread.
If the short thread is a knot-thread,
you just go on knotting with the new thread. Later on you should make a double knot (a right- and a left-knot) with the two
short ends on the backside of the bracelet and maybe use a drop of superglue. Then you cut the two short ends
on the backside to 1 - 2 mm.
Finishing the Bracelet
On top of this page there is a bracelet to be seen with the braids on each side. Here you can download directions
for how to finish a bracelet as a PDF-file:
download Finishing the bracelet
Bracelets of Category 1
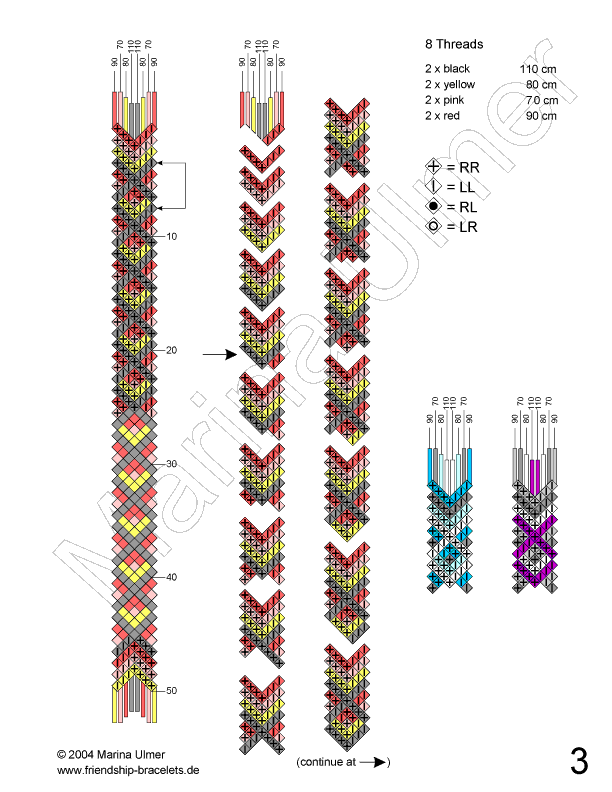
The next picture shows
a Category-1 knot-pattern.
The entire bracelet pattern is depicted on the left, and to the right, there is a step-by-step-direction.
Next to these are the beginning patterns of one or two more bracelets, whose different pattern arises just by
arranging the threads in another way.
Bracelet No. 3 was my very first bracelet. When my daughter came home from vacation more than 10 years ago
wearing one, I was totally fascinated and asked: "WOW! How did you make that?" She showed me and I have
been hopelessly hooked ever since.
Some of the threads are invisible stationary threads for the bracelet and never knot-threads,
their colors are never seen. These threads
have been designated as "blind". The color of these threads doesn't matter; to distinguish, I often
chose gray at the knot-patterns. During the knotting process it's much easier if these threads are a color that is not used in the
bracelet. But since you see this color in the two braids at the ends, you may want to choose a color that is
also used in the bracelet.
It's possible to alter the pattern sequence. Care must be taken, however, to always proceed from top
to bottom. Knots can never be made from bottom to top!
|
|
|
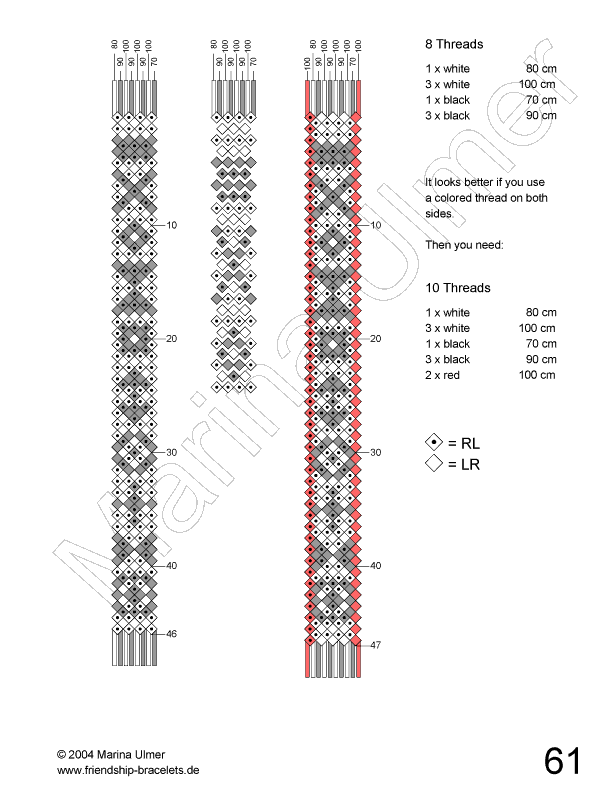
Bracelets of Category 2
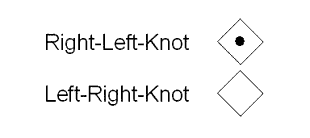
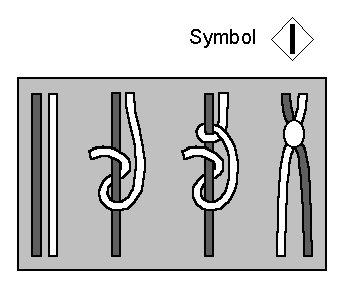
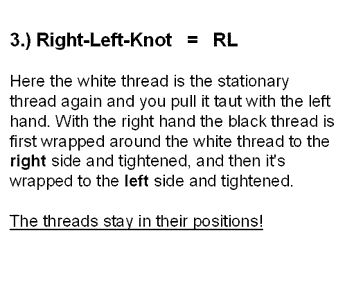
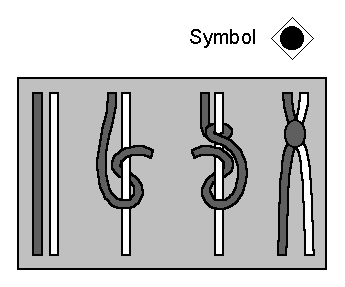
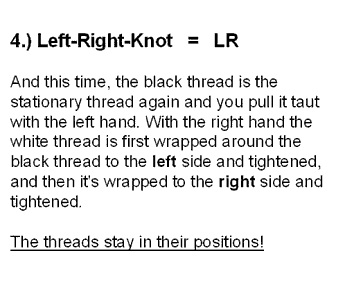
The bracelets of Category 2 consist of only Right-Left- and Left-Right-Knots. For these bracelets
I made up different symbols, because the symbols above are not applicable. These symbols are:
|
|
|
Because these bracelets are knotted horizontally, row after row, step-by-step-directions are not
necessary. I always put a ruler or piece of paper or cardboard on the knot-pattern and move it downwards,
row by row.
These bracelets are different from Category 1, in that with every knot you always have two new
threads in your hands. With each knot you have the choice of a white or black thread, and you can decide
whether the visible dot should be white or black. If you knot the rows diagonally (Category 1) you always
move on by only one thread; if you knot the rows horizontally (Category 2) you always move on
by two threads.
The threads always stay in their original positions. That's why the alternating order -- black, white, black,
white -- may never change. If suddenly two black or two white threads show up side by side, a mistake has
been made in the previous row. (Happens to me constantly!)
If the bracelet consists of an even amount of strings, there is always a "complete row"
and a "between row". The "between row" consists of one knot less and the threads on the very right
and very left side are not used.
If the bracelet consists of an uneven amount of threads, there will be the same amount of knots in
every row. Alternately, the thread on the very right side is not used; in the following row,
the thread on the very left side is not used.
For better illustration, I have shown on only the following knot-pattern the rows distanced from one another.
|
|
|
Many thanks to Erich Friedman, who kindly allowed
me to figure out his patterns and include them on my website.
© 2004-2026 Marina Ulmer
|
|




 The knot-pattern for each bracelet can be ordered
as a PDF-file, for the cost of $1.00. (Two